Category Archives: Baking

5 Minute Bread Dough

Prep time: 5 minutes

Bake time: 40 minutes

Total time: variable

Entry number two in the Broke Ass baking series.

“Good bread is the most fundamentally satisfying of all foods; and good bread with fresh butter, the greatest of feasts”

-James Beard

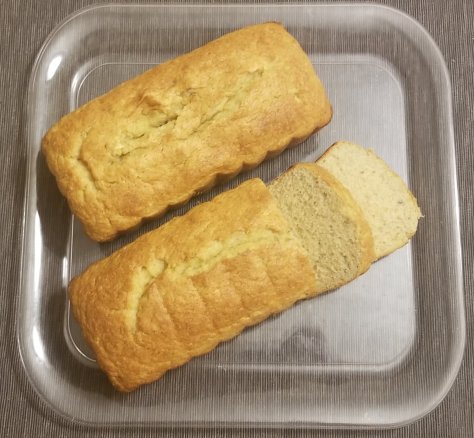
There is nothing better than some crusty bread fresh from the oven.

The Ingredients:

  • 6 1/2 cups All Purpose Flour
  • 3 cups water (80° to 100°)
  • 1 Tblsp Kosher Salt
  • A Splash of Olive Oil

The Method:

Pour water, salt, and oil into large container.

Stir to until salt is dissolved .

Stir in 6 1/2 cups of flour.

Stir ingredients until a wet dough forms, do not bother kneading gluten will form in time.

Let dough sit at room temperature for 1 hour to 5 hours until it had risen and begun to deflate.

Put the dough in the fridge and make use of as you see fit.

Making Bread

  • Open dough container take out a fist sized ball.
  • Roll in to a ball and place on either a peel with corn meal on it or with a sheet of parchment paper on it.
  • Cut dough either in decorative or traditional ways.
  • Pre heat oven to 400° with a baking stone approx 6 inches from the top of the oven.
  • While preheating place a broiler pan in to heat up.
  • Let dough do a second rise for about 30 minutes or until it has about doubled in sized.
  • Slide dough ball on to baking stone and pour a cup of water in to the roasting pan. (You have just made a steam oven… of sorts.)
  • Bake until crust is browned to your liking and firm to the touch. About 30 minutes.
  • Lastly if you have the spiritual fortitude to do so, let the bread cool to room temp before eating, you crumb will be better and this the texture.

Final Thoughts:

When it’s all said and done this dough can be used in many different applications honestly I mostly use it for pizza and calzones during the week. But it makes great crusty bread that goes with most dinners.

If you are wondering what the strange plastic container is, it’s an old red vines container cleaned and repurposed. I’m a big fan of repurpising containers to reside plastic waste and because it’s way cheaper than buying a container.

Sourdough Bread (#FermentationFridays)

In the Encyclopedia of Food Microbiology, Michael Gaenzle writes: “The origins of bread-making are so ancient that everything said about them must be pure speculation. One of the oldest sourdough breads dates from 3700 BCE and was excavated in Switzerland, but the origin of sourdough fermentation likely relates to the origin of agriculture in the Fertile Crescent several thousand years earlier

All sourdough recipes begin with a starter or a mixture of flour, water and maybe a little sugar. Sitting at room temperature, wild yeasts in the air and on the grain settle into the mix. The fermentation that occurs after a few days gives the starter its sour smell. Then it’s ready to use, for years if treated with respect. In my case I gave it a boost with some commercial yeast as well.

Before we get into the ingredients, we need to discuss measuring by volume versus measuring by weight. From my experience I have found that weighted measurements produce much better products and much more consistent results. So for this and most likely any other bread recipe that I post I will have it in weight not volume. So get that food scale out you are going to need it. Also we are using “Baker’s Percentages” they are kind of weird but hopefully they’ll make sense.

The Ingredients

  • 500 grams flour of choice (Bread, AP, Whole Wheat, etc)
  • 400 grams water (80% hydration)
  • 75 grams Starter (15% of flour weight)
  • 10 grams salt (2% of flour weight)

The Methods:

  • Activate your starter

– feed you starter with equal parts floor & water. Then let it set for about 2 – 6 hours or until it has hopefully doubled in size.

– Make sure to use your starter at it’s peak, best thing is to look for it to have at least doubled in size, has a nice rounded top (usually means its still active and not yet began to fall), and it’ll smell tangy

  • Autolyse

– This will seem weird but I promise it works wonders. To autolyse your dough you are simply going to mix together the flour and water and let it set at room temp for 45 minutes covered. What you are doing is letting the flour hydrate which makes a much nicer gluten structure.

  • Add starter and salt to autolyse dough.

– this is going to be a sticky, messy dough. t/That’s all good! Cover and let the dough rest on the counter.

Now comes the hard part…

  • Stretch and fold (to build some great bread)

– every 30 minutes for the next 2 hours you should uncover your dough and stretch and fold it over and into its self. Yes this is alot of work for bread, and yes it is very much worth it. Around the 4th stretch your dough will be smooth, supple, and ready to make some bread.

  • The rise

– the first option is to let the dough rise at room temp for an hour or two, form into loaves and get ready to bake.

-Option the second it to cover the dough and place it into the fridge and get the slow cold ferment. Personally I like the slow ferment, but you do you.

— if you did a slow rise in the fridge you will need to bench rest the dough for about 45 minutes to an hour so the dough can return to room temp.

  • Shape that dough.

-Flour your bannaton of you’ve got one, otherwise do it by hand and be careful.

  • Bake

-There are a lot of options for this process, the two most common would be to preheat your oven with a cast iron or ceramic dutch oven in it with a lid. Or to preheat your oven with a baking stone about midway up the oven and a metal pan with about an inch or two of lip around the edges.

— if using a Dutch oven after the oven is been preheated for about 30 minutes to an hour place your shaped loaf onto a piece of parchment paper and place that into the Dutch oven lid on and bake for 15-25 minutes

— if you’re using a baking stone preheat your oven with your baking stone and your metal pan when it’s time to bake formula loaf onto a piece of parchment paper, this creates a sort of “steam oven” like professional bakers use. This will greatly help with the development of the crust. Bake your bread for 15-25 minutes.

Cheaty Banana Bread

Prep time: 5 minutes

Bake time: 40 minutes

Total time: 45 minutes

Alright so today we have our first in the Broke Ass Baking series.

B. A. N. A. N. A. S. This S**t is Bananas… ok but seriously this has got to be one of the easiest ways to make some quick bread, and to be clear it was already quick to make.

This banana bread is moist, sweet, easy to make, and above all crazy cheap. I used my food processor for the whole mixing thing, and I’m sure some one will ask, “but dude, why not the stand mixer?” The answer is easy, banana chunks! I am no a fan of chunks in banana bread, they make me want to gag. So smooth banana puree is a must in my book. I simply toss all the ingredients in to the processor, give it a spin for a minute or 2 and voila banana bread dough… batter… I’m honestly unsure which is the correct terminology here.

…Enter google…

Well crap it appears both are ok, though some debate is out there. Shocking I know, disagreement on the internet.

Bake off the batter-dough and then enjoy, or let the bread cool then enjoy. The order of those last two operations are up to you.

The Ingredients:

  • 1 box cake mix (I used butter, spiced would be rather nice too)
  • 2 eggs
  • 3-4 ripe bananas
  • Tblsp veg oil
  • Extras
    • Nuts
    • Chocolate chips
    • Idk do what you want, I’m not the boss of you.

The Method:

Preheat oven to 350.

Mix all ingredients together until a batter forms.

Grease two small loaf pans with your preferred food lube.

Pour batter into two small or one large loaf pans, previously greased.

Bake for 30-45 minutes

Done!

Final Notes:

Now I mentioned that this recipe was cheap and I meant it. Here was my cost break down for the two loaves pictured above.

Disposable loaf pans – $0.43

Bananas – approx $1.00

Cake mix – $0.50

Eggs- $0.34

Total cost – $2.27 for the recipe or $1.13 a loaf.

These loaves have a very nice crumb and are moist. They make a nice sweet breakfast or great dessert. I am thinking what other fruit this might work with… I’ve a few pounds of black berries I need to do something with. Maybe black berry bread…. hmmm

For Starters

A starter, or “sponge” as the pioneers called it, feeds many families over many years. Starters have always been passed through families and from friend to friend.

  1. The actual process is easy enough…
  2. Feed your sourdough starter the night before you want to bake.
  3. Start the sourdough bread recipe the next morning.
  4. Let the dough rise until early afternoon before baking and cooling.

But before all the baking and such you need a starter!

The Ingredients:

  • 1 Cup warm water
  • 1/2 cup sugar
  • 2 teaspoons dry yeast
  • 3 Tablespoons Instant Potato Flakes
  • 1 Cup Water
  • 1 Cup Flour


The Method:

In a small container mix together the water, sugar, yeast, and potato flakes. Let set lightly covered for 2 days. This should get frothy or bubbly.

After 2 days fermenting combine the starter with one cup flour and one cup water making a sponge at which point every 3 to 5 days you will need to retain one cup of your sponge and add to it 1/2 cup flour and 1/2 cup water.

I store mine in the fridge, and divide it every time I do a feeding. I feed both the portion going back in the fridge and the portion I keep out. I feed to portion that is usually tossed because I make use of it and don’t actually toss it.